Tuto 6: Trick to get 5 auto-braketed photos with a Nikon D7000

Before starting

Here's a little trick I use with my Nikon D7000 to get quickly and easely 5 auto-braketed photos with increments of 1EV. This can be useful to process HDR images with more informations than when processing from 3 braketed photos (refer to this tutorial for this point: Braketing for HDR).

Things you need

Your Nikon D7000 and its manual (in case you don't know how to use U1 and U2 instant recall mode).

The objective

Configuring U1 and U2 mode in order to quickly take 5 auto-braketed photos. One reason to use 5 photos instead of 3 is the amount of noice generated on the HDR image: it is much well controled. I also noticed better results depending of the scene you are working on.

The trick

 If you own a D7000, you may know that braketing is limited to 3 photos, with EV increments of 0.3, 0.7, 1.0, 1.3, 1.7 and 2.0. Usually, I use braketing of 3 photos with a 2EV increment between each.
If you own a D7000, you may also know that it proposes an interesting option that allows you to create two different user profils (called U1 and U2):


For each profil you have the opportunity to save any shooting scenario you want (i.e. A/S/M mode, file type, white balance, ISO, and all the others stuff you usually use).


The idea to get 5 auto-braketed photos is to configure U1 and U2 modes as following:

U1: bracketing of three photos with 1EV increment.
U2: bracketing of three photos with 2EV increment.
Note that apart braketing parameters, all other parameters should be the same from U1 to U2.


Thus, when I shoot the three photos with U1, and then shoot three photos with U2, I'll get six photos (with a duplicate one) with those expositions:

-2/-1/0/0/+1/+2

Just delete one of the duplicated 0EV, and you have 5 auto-braketed photos with 1EV increment, just by switching quickly the U1/U2 mode.

Next step will be HDR processing, this way: http://bwtutorials.blogspot.com/2011/10/tuto-2-hdr-for-black-and-white-with.html


Tuto 5: Split toning with Lightroom

Before starting

Here we are for another complement of tutorial (more than a tuto). I will show you how to play with the split toning menu of lightroom...

Things you need

Nothing special, just the desire to try something new.. :)

The objective

The split toning will allow us to color our photo with grey levels. We can add only one colour for the overall photo, or affect a specific color to the highlights and another one for the shadows. I often use this technique for aging a photo. I will show you how to transform this classic black and white photo:


Into this timeless one:


First step: Setting up highlights

We have to go to the Split Toning menu of the develoment mode of Lightroom. For the expected result, I chose a color to apply to the highlights of the photo with the "Hue cursor". I chose a color which tents to the yellow, with the appropriate satturation:


Step 2: Setting up the shadows

I do the same for the shadows. I general I chose a color which tents to the blue with a low saturation level:


Last step: Balancing

After setting up highlights and shadows, I play smoothly with the balance cursor in order to equilibrate the effect between the highlights and the shadows:


We are done with that! Just keep in mind that there is nothing more efficient than practicing and trying things by yourself! Those tools are as powerful as easy to use, the most "difficult" thing is to understand how they work. If you get that, you get all!

Damien

Tuto 4: "Spot removal" tool on Lightroom

Before starting

This article can be consider as a complement of tutorial more than a tutorial. I just wanted to highlight a particular tool proposed by Lightroom: The spot removal tool.

Things you need

Lightroom, of course, and a photograph with some defects to correct...

The objective

The spot removal tool is another powerful tool very simple to use. I use it as soon as I have to remove imperfections from a photo (for example those two people installed far away on the beach that I wanted to take in photo). More generally, it will be little details to remove or traces of dust.

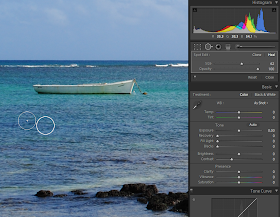
We'll see here how to remove this little red thing


After:


First step: Setup the tool


1: The spot removal tool is available on the top of the development menu, by clicking the white circle.

Then, you have to choose between two modes:

2: Clone mode: Applies the sampled area of the photo on the selected area.
3: Heal mode: Applies the texture, the brightness and the shadow of the sampled area of the photo on the selected area.
4: Adjust the size of the area you want to correct.
5: Adjust the opacity of the selected area.

Step 2: Heal mode

For this example, I use the heal mode in order to apply a duplicate area with the correct texture, brightness and shadow: this is exactly what I want in order to do a smooth correction.
Once the setup of the tool is done, I adjust the selection circle on the area I want to correct:


Then, I just click on it. Lightroom will automatically duplicate an area near to the spot I clicked on:


To finish, I can adjust to my convenience the right circle to get the expected result (by changing its size or moving it on another area).

Step 3: Clone mode

As you understood, the clone mode will allow me to make a perfect copy of an area to another. The way to use it is the same as for the heal mode. Here is a simple example:


Hope you enjoyed that, see you soon for another tuto...
Damien