Before starting
This article can be consider as a complement of tutorial more than a tutorial. I just wanted to highlight a particular tool proposed by Lightroom: The spot removal tool.
Things you need
Lightroom, of course, and a photograph with some defects to correct...
The objective
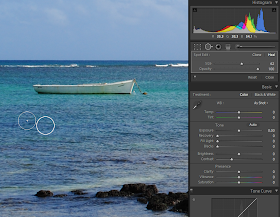
The spot removal tool is another powerful tool very simple to use. I use it as soon as I have to remove imperfections from a photo (for example those two people installed far away on the beach that I wanted to take in photo). More generally, it will be little details to remove or traces of dust.
We'll see here how to remove this little red thing
After:
First step: Setup the tool
1: The spot removal tool is available on the top of the development menu, by clicking the white circle.
Then, you have to choose between two modes:
2: Clone mode: Applies the sampled area of the photo on the selected area.
3: Heal mode: Applies the texture, the brightness and the shadow of the sampled area of the photo on the selected area.
4: Adjust the size of the area you want to correct.
5: Adjust the opacity of the selected area.
Step 2: Heal mode
For this example, I use the heal mode in order to apply a duplicate area with the correct texture, brightness and shadow: this is exactly what I want in order to do a smooth correction.
Once the setup of the tool is done, I adjust the selection circle on the area I want to correct:
Then, I just click on it. Lightroom will automatically duplicate an area near to the spot I clicked on:
To finish, I can adjust to my convenience the right circle to get the expected result (by changing its size or moving it on another area).
Step 3: Clone mode
As you understood, the clone mode will allow me to make a perfect copy of an area to another. The way to use it is the same as for the heal mode. Here is a simple example:
Hope you enjoyed that, see you soon for another tuto...
Damien


